Adventures in Healthy Baking: Flourless Dark Chocolate Peanut Butter Brownies!

A couple weeks ago, I was crabby and having a bad day and wanted a brownie.  I posted so on Facebook and a friend of mine sent me a link to the recipe for some flourless brownies (Click here for the original recipe from Ambitious Kitchen). I didn’t make them then because I was too lazy, but I made them yesterday and man am I glad I did because…YUM.
-4I tweaked the recipe a bit, because I’m not concerned with being vegan, so I added an egg.  I also used crunchy peanut butter because I like nuts and dark chocolate chunks because I didn’t have any chips but I had a big bar of very dark chocolate.

These definitely taste like dark chocolate, so if that isn’t your thing, you’ll probably want to add some more honey and maybe a small extra ripe banana or some dates for some extra sweetness.  But I liked them just the way they turned out.-5

Flourless Dark Chocolate Peanut Butter Brownies

1/2 cup crunchy all-natural peanut butter (smooth would work fine too, or any nut butter for that matter)
1/4 cup raw honey (maple syrup would also work – again if you want it sweeter, maybe go up to a 1/3 cup)
1 teaspoon vanilla
1 egg (optional – I think without the egg, they’d end up a little fudgier, like the original recipe – mine were a little more cake-like)
1/2 cup all-natural (no sugar added) applesauce
1/2 cup unsweetened cocoa powder
1/2 teaspoon baking soda
1/8 teaspoon salt
1/4 cup dark chocolate chunks (I used a few squares from a very dark chocolate bar, chopped up. Dark chocolate chips, or regular chips would work to, whatever you like – or omit them all together.)

-Preheat oven to 350 degrees.  You could make these in a 8x8in pan or do what I did and make them into individual muffins – for me, it made 6 good sized muffins.
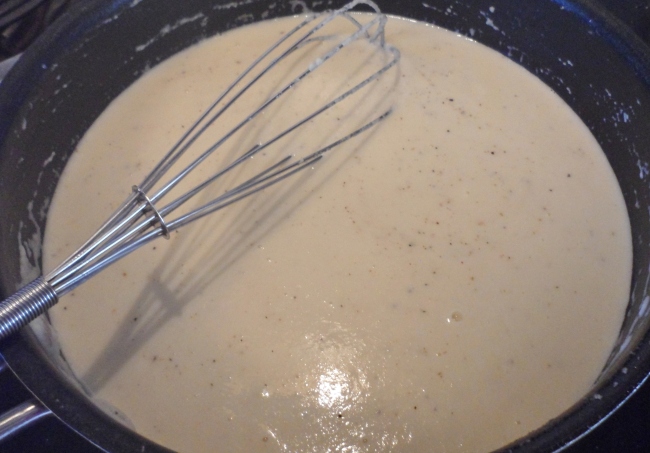
-Mix together peanut butter, honey, vanilla, egg and apple sauce until smooth.
-Add cocoa, baking soda and salt – stir slowly until well mixed. (I ended up with cocoa powder all over myself, so take my word for it, stir slowly!)
-Fold in chocolate chunks.
-Pour into greased pan of your choice. My muffins took about 15 min. If you use the egg, you’ll want to make sure they’re cooked through, check with a toothpick – if it comes out clean, you’re good to go.
-Allow to cool a bit before digging in.
-Enjoy!

(Recipe adapted from original at Ambitious Kitchen)

-1

j,ft❤

Easy Egg Muffins

-7

Easy Egg Muffins

A yummy, healthy and quick make-ahead breakfast.

-10 Eggs
-2 Tbsp. milk of your choice
-Salt and pepper to taste
-Breakfasty toppings of your choice (I used sauteed mushrooms and green peppers, bacon, homemade breakfast sausage, cheese, green onion and spinach)

1. Preheat oven to 375.
2. Beat eggs, milk, salt and pepper.
3. In a well greased muffin tin, add meat, veggies, cheese of your choice.
4. Pour over egg mixture (about 1/4 cup in each).
5. Bake 25-35 min depending on your oven and pan. Basically until the’re golden brown, risen a little and the egg is cooked through.

Makes 12.  Can be stored in fridge for up to a week or frozen.

-8

-3

-2

-4

-6

Enjoy!  Let me know if you try them and tell me what you put in em!

j,ft❤

Cinnamon-Raisin Ezekiel Bread French Toast w. Maple-Berry Protein Syrup

 Cinnamon-Raisin Ezekiel Bread French Toast w. Maple-Berry Protein Syrup (Single Serving)

For the toast:
– 2 pieces cinnamon raisin Ezekiel bread
– 2 eggs
– 3 T unsweetened vanilla almond milk
– 1/4 t cinnamon
– 1/4 t vanilla
– pinch of salt

Mix eggs, almond milk, cinnamon, vanilla and salt together in a shallow dish.  Place bread in mixture to soak. After a few minutes, turn them over.  My bread soaked up every drop of the mixture. In a pan, melt some butter or warm up some coconut oil.  Cook french toast until golden brown on each side.

For the syrup:
– 1 T pure maple syrup
– 1 T butter (melted)
– 1 T vanilla protein powder
– 3/4 c frozen mixed berries
– Dash of cinnamon
– pinch of salt

In a small sauce pan, whisk together: maple syrup, melted butter, protein powder, cinnamon and salt.  Once combined, add berries.  Bring mixture to a simmer over low heat, stir frequently and reduce until berries break down and mixture reaches desired consistency.

Top toast with syrup and stuff your face. Believe me, this is delicious!!!

ImageImageImage

Cauliflower Awesome Sauce

Image

Alfredo sauce used to be one of my favorite things, but it is definitely NOT good for you. I’ve seen recipes for “skinny” Alfredo sauce before but I’ve never tried them until I came across this recipe for Creamy Cauliflower Sauce (Click there to go to Pinch of Yum where I found the original recipe – I’ve tweaked my version a bit). It’s not exactly like that creamy Alfredo sauce I used to love, but it is delicious and I’m SO glad I tried it.  It will definitely be a frequent go-to in my kitchen!

Cauliflower Awesome Sauce

– 1 large head cauliflower – I ended up with about 4 cups of florets
– 3 teaspoons minced garlic
– 2 tablespoons butter
– 5 cups liquid – I used half chicken stock, half water (veggie stock would also work)
-1/4 c milk
-1/4 c cream cheese
-salt and pepper to taste (I used lots of fresh cracked black pepper)

Saute the garlic in the butter on low until it’s soft and smells delicious, just don’t brown it. Set aside.

Bring cooking liquid to a boil.  Chop up the cauliflower (just use the florets, not the stem) and boil until tender, about 10 min.  Don’t drain it!

Use a slotted spoon and put the cauliflower in a blender.  Add a ladle full of the cooking liquid, the garlic-butter, salt, pepper, milk and cream cheese.  Blend it up!  Slowly add more of the cooking liquid until you have reached your desired consistency.  You could make it thick or thin – it’s up to you.  Either way, it’s gonna be delicious!

Serve!

Makes about 4 cups of sauce.

What to use this for?  Well if you eat pasta you could use it as a pasta sauce.  I’ve eaten it for a few days now and I’ve had it a couple of different ways.  I served it with roasted spaghetti squash and sauteed shrimp.  I served it with roasted spaghetti squash and chicken breast tenders coated in seasoned garbanzo bean flour.  I used it as a sauce over broccoli and grilled chicken.  I’ve eaten it with a spoon.  My mom loved it – even my picky dad liked it!  Sprinkled with some Parmesan cheese, it’s extra delicious.

Every time I eat this stuff, I think I’m eating something bad for me!

Now look at it – doesn’t it look creamy and delicious!?  Now go make some and put it in your face.Image

Image

Image

❤ Jes


Okra

Okra has long been one of my favorite foods. I know some people who have never heard of okra, others are turned off by it’s sliminess – but I just love it. The best part is, okra is really good for you – it has lots of vitamin A and C and dietary fiber that is good for normalizing blood sugar and helps with digestion. 

My grandparents always grow oodles of it in their garden and since they know how much I love it, they share! Isn’t it beautiful?ImageNormally, I slice it up, season it, toss it in a cornmeal/flour mix and saute it with onions.  It’s also amazing battered and fried.  BUT – I’m not eating flour at the moment and I’m definitely avoiding fried foods, so I looked up alternative ways to prepare it and I’ve found a new favorite: oven roasted. It’s very easy and delicious!

Oven Roasted Okra

What you’ll need:  fresh okra, coconut oil (or oil/fat of our choice – I’ve also used butter and bacon grease), salt, pepper, spices of your choice.

1. Preheat oven to 450 degrees.
2. Rinse off and pat dry.
3. Chop off the top and slice in half lengthwise (really tiny ones I left whole).Image4. Toss in enough melted coconut oil (or oil/fat of your choice) to coat, I used about a tablespoon.
5. Season with salt, pepper and spices of your choice.  I used smoked paprika, garlic pepper and red pepper flakes (because I like them a little spicy). Image6. Throw them on a cookie sheet and put em in the oven.  Image

7. Bake at 450 for about 5 min – shake the pan around and cook for about another 5 – 8 min until you think they’re done.  They’ll look browned around the edges and some will be crispier than others (the little crispy ones are my fav). ImageImage8. Eat and enjoy!  Aren’t they pretty? Yum yum yum. 

♥ Jes

p.s. What are your thoughts on okra?